Introduction
About me
First of all, hi and nice to meet you! 👾 Welcome to my dev log.
My name is Pauline and I’m currently a masters student at HTW Berlin for International Media and Computing . I have been focusing mostly on game development with Unity during my Bachelor studies, but grew to love backend web development thanks to my job as a working student. Currently, I work at Sandbox Interactive as a web developer, mostly picking up backend tasks.
When I’m not coding, you can usually catch me drinking a cup of green tea, gaming, or complaining about something (mostly uni stuff though 👀). I would also consider myself someone who takes cooking, recipe searches, and recipe organization very seriously. The amount of recipe books and magazines I have accumulated at home is slowly scaring me, and it hurts the part of me that wants to digitize literally everything and enjoys gathering and evaluating a lot of data.
I’ve recently worked on two web projects for some uni courses, which made me realize that I’ve gotten into a good flow with Spring Boot/Java, but not at all with any frontend frameworks. I’ve had some brief contact with Vue.js and React/React Native at work or for those uni projects, but still feel like I have no clue about frontend development at all (might be because I’m not a big fan of JavaScript.. but maybe TypeScript can help?).
This made me think that I’d have great grounds for a dev log about the cookbook app I had planned for a while now - showing my process and sharing some knowledge about Spring Boot, whilst taking you on a learning journey about frontend development with me.
About the project
I have never found a cookbook app that I like. They never have all the features I want, and even when I am willing to do without one of those features, a lot of stuff is hidden behind paywalls. To change this I have already spent a lot of time collecting feature ideas and planning a roadmap to develop the ✨perfect✨ cookbook and meal-planning app. This is a dream project of mine, but I am aware that I might not make much progress as a team of one.
So instead of targeting a full-fletched project what I want to do for now is to lay the foundation for this app. I’ve planned out the tasks for a very rough MVP and have enrolled the development of said MVP into one of my uni courses. If you want to know more about the exact process I want to follow for the next 3-4 months, take a look at the proposal I wrote for the enrollment.
In order to complete the uni course, I’ve tasked myself with the development of a mobile recipe database application, and an accompanying service for transforming recipe texts into a uniform recipe format. This service will later be used to create new recipes by reading them from websites or images provided by the user.
I have already decided on some of the technologies I want to use: Spring Boot in the Backend, React Native in the Frontend. I was told that React is generally a good framework to use as a backend enthusiast, so I hope this proves to be true.
So now - let’s conclude the introductions and get started with development!
Overview & General Progress (TLDR)
Tasks I worked on during this session:
- ✅ Backend Setup
:
- Set up spring boot and necessary dependencies
- Created GitHub repo
- ✅ Frontend Setup
- Set up react native and some libraries, added web capabilities
- Created GitHub repo
- ❓ Naming:
- Getting inspiration from GPT (as any student would do at the moment) and researching some ideas on google
- Decided on working title “PlatePal”
During all of this I tinkered around with my JetBrains products a lot; I added YouTrack integrations to IntelliJ and updated all products and plugins. I also made sure my IONOS server was ready for future deployments. Thanks to student licensing I get to use all of these products (almost) for free, including JetBrains products, GitHub Pro, an IONOS Cloud Server and Notion (which I used to write this very Dev Log).
Backend Setup
Starting a new Spring Boot project has become routine for me. I have already installed and fully configured IntelliJ, know which dependencies I prefer to use, and which ones require extra work to get running. In this document, I will provide a quick rundown of my process for this specific project.
To challenge myself and try something new, I have decided to use Java 17, which I have not used before.
- Create a Spring Boot 3.0.5 project with Java 17 and all dependencies, of which I know that I will need them. Those
include:
- Lombok : I cannot live without Lombok. Whenever I go back to other programming languages or have to use java without any libraries I miss it a lot. Not having to write boilerplate code is a blessing, and it makes everything look so much cleaner.
- Spring Security : I already know, that all my Endpoints will have to be protected so no unauthorized eyes can view each others sensitive data, or - even worse - secret family recipes.
- Spring Data JPA with PostgreSQL Driver

Setup a PostgreSQL database: I already have a PostgreSQL 13 server running locally, so I simply had to add a
platepaldatabase (I use JetBrains DataGrip for most of my database work).Configure the Spring data connection to the postgres database:
spring:
  datasource:
    url: jdbc:postgresql://localhost:5432/platepal
    username: postgres
    password: ${PG_PASSWORD}
I added the
PG_PASSWORDvariable as environment variable to my IntelliJ run config. For now I didn’t add any environments/profiles to my config file, I can worry about that once I want to deploy the application to a server or configure a CI/CD pipeline.Mapstruct is one of my favourite and most used libraries in Spring Boot. I decided to add it for future data mapping between JPA Entities and DTOs:
<dependency> <groupId>org.mapstruct</groupId> <artifactId>mapstruct</artifactId> <version>${org.mapstruct.version}</version> </dependency><org.mapstruct.version>1.5.3.Final</org.mapstruct.version>Simply adding the mapstruct dependency does not function in combination with lombok. The following configuration has to be added to the maven-compiler plugin in the build part of the pom.xml:
<plugin>
	<groupId>org.apache.maven.plugins</groupId>
	<artifactId>maven-compiler-plugin</artifactId>
	<version>3.5.1</version>
	<configuration>
		<source>${java.version}</source>
	  <target>${java.version}</target>
	  <annotationProcessorPaths>
	    <path>
	      <groupId>org.mapstruct</groupId>
        <artifactId>mapstruct-processor</artifactId>
        <version>${org.mapstruct.version}</version>
      </path>
      <path>
	      <groupId>org.projectlombok</groupId>
        <artifactId>lombok</artifactId>
        <version>${lombok.version}</version>
      </path>
      <dependency>
	      <groupId>org.projectlombok</groupId>
        <artifactId>lombok-mapstruct-binding</artifactId>
        <version>0.2.0</version>
      </dependency>
    </annotationProcessorPaths>
  </configuration>
</plugin>
With this, lombok and mapstruct can be used together. All that’s left is to enable annotation processing in IntelliJ (which I had to do again because I updated to a new version).
I also added and configured Liquibase for easier data structure setup in the PostgreSQL database via sql migrations, which are executed when building the Spring Boot application.
<dependency> <groupId>org.liquibase</groupId> <artifactId>liquibase-core</artifactId> </dependency>spring: liquibase: change-log: classpath:/db/changelog/changelog-master.xml<databaseChangeLog xmlns="http://www.liquibase.org/xml/ns/dbchangelog" xmlns:xsi="http://www.w3.org/2001/XMLSchema-instance" xmlns:ext="http://www.liquibase.org/xml/ns/dbchangelog-ext" xsi:schemaLocation="http://www.liquibase.org/xml/ns/dbchangelog http://www.liquibase.org/xml/ns/dbchangelog/dbchangelog-3.1.xsd http://www.liquibase.org/xml/ns/dbchangelog-ext http://www.liquibase.org/xml/ns/dbchangelog/dbchangelog-ext.xsd"> <includeAll path="/db/changelog/migrations"/> </databaseChangeLog>After configuration I also added my first liquibase SQL migration, to test whether everything was running smoothly.
-- liquibase formatted sql

-- changeset pauline_roehr:20230407_1203_platepal_schema.sql
CREATE SCHEMA platepal_accounts;
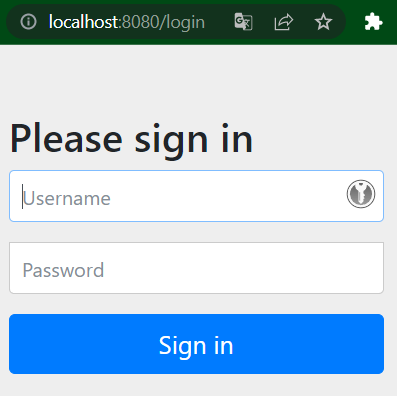
The application is now ready to be launched, and a successful first run has been executed. Thanks to the Spring Security dependency, a simple login screen appears when visiting http://localhost:8080/. This behavior will be modified later on.
I have pushed this base setup to a fresh GitHub repository and made sure to protect the main branch afterwards. With that, my very first task for this project is complete!

I decided to add a few research tasks to my backlog while working on this, namely:
- Why I should or shouldn’t use Java 17: Up until now I have only worked with Java 8 and Java 11. The newest Spring Boot versions only support Java 17 development, so I decided to give it a try in this project. I am worried that some of my favourite libraries might not be ready for Java 17 yet though, so I will have to take a closer look at this.
- Take a look at some of the dependencies I frequently use without much thought. I know I need them, but what do they
do? What would be missing without them?
- Spring Web
- Spring Configuration Processor
- Spring Boot DevTools
Frontend Setup
Before starting, I already had JetBrains WebStorm, Node v18.12.1, npm 8.19.2, and an Android emulator installed. I added some (hopefully) helpful plugins to WebStorm, namely React Buddy and React Native Console (Free) . I also globally installed ESLint and its react and react-native plugins via npm.
I then initialized a react native project with
npx react-native@latest init platepal-frontend .
I also decided that I wanted to have the possibility to test my app on web. In the far future I want PlatePal to be available on a multitude of platforms. By providing a web view I may also be able to test the App on iOS a bit earlier.
To do this, I followed a tutorial by Retool . I’ll show you the most important steps I took:
npm install react-dom react-native-webnpm install --save-dev babel-plugin-react-native-webnpm install --dev react-scripts- Moved
app.json,App.tsxandindex.jsto a new folder/src - Added
index.native.jsto the project root:

import {AppRegistry} from 'react-native';
import App from './src/App';
import {name as appName} from './src/app.json';

AppRegistry.registerComponent(appName, () => App);
- Added
index.htmlto a new folder/public:
<!DOCTYPE html>
<html lang="en">
<head>
    <meta charset="UTF-8">
    <meta name="viewport" content="width=device-width">
    <title> Demo Project </title>
</head>
<body>
<div id="root"></div>
</body>
</html>
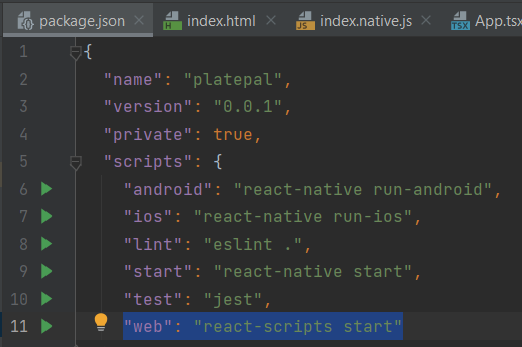
I then added "web": "react-scripts start" to the package.json scripts.
From there I created some run configurations for web and android, simply by pressing the green “Run” Buttons next to the scripts.
I don’t know a lot about React Native (or Frontend development in general), so this will be a big learning process for
me. I added i18n because I believe it is easier and better to start early with localization.
npm install react-i18next i18next --save
Other than that I will still have to decide on a component library, so I’ve also added a task to my backlog to check out some of them:
- React Native Paper
- React Native Elements
- NativeBase
- UI Kitten
- RNUI Lib
- Shoutem

This was the final status for the basic react native setup I had planned, so I added a README, a .gitignore and pushed the result of my second ticket to a new repository.